
Gimp to Windows
Description
GIMP is a cross-platform image editor available for GNU/Linux, Mac OS, Windows, and other operating systems. It is a free program that ranks among the top open-source software.
Whether you are a graphic designer, photographer, illustrator or scientist, GIMP provides you with many unique tools to get the job done. You can further enhance your productivity with GIMP, thanks to its many customization options and third-party plug-ins.
Specifications
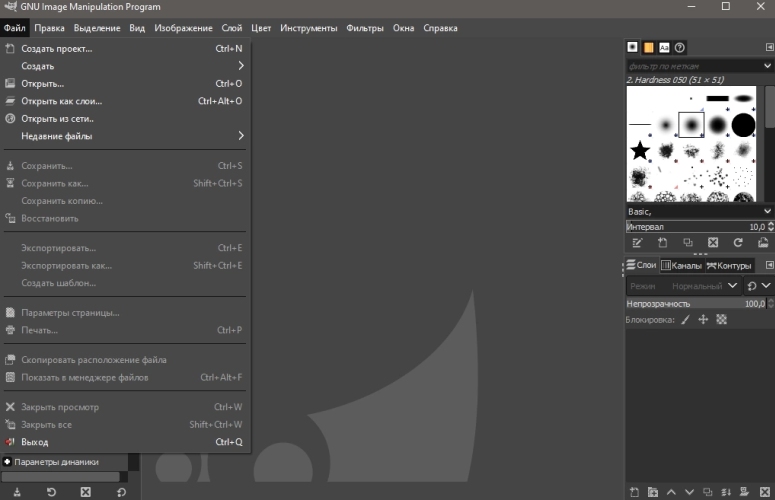
Screenshots
Pros and Cons
- Includes many brushes, gradients, effects, filters, and other processing tools
- Integrated support for psd format
- A wide range of functions for batch processing of images
- A large number of plugins for free access
- Adjust the interface to your needs, open the desired item in a separate window or tab
- A portable version is available
- Ability to work with graphics tablets
- Allows you not only work with digital photos, but also create your own logos and designs for websites
- Controls are implemented specifically and not everyone will be to their liking
More about Gimp
The program has a standard interface that matches the high-level graphical layout. The GU interface is designed to drive improved performance. On closer inspection, you'll notice that the user interface is divided into three parts. There's the main editing area, a set of tools and layers, paths, undo and channels. The image tabs display vital thumbnails that simply display the name unlike other programs.
Although GIMP lacks the depth of commercial photo editing software, it provides all the features, commands and tools you need. In addition, the software goes beyond the basics and provides some advanced editing tools such as channel manipulation. Its "open as layers" command is a notable feature that allows users to display an image in a layer of another.
In addition to being an open source program, GIMP is easily extensible. It allows the user to increase productivity through a variety of customization options and support for third-party plug-ins. Its active community of developers has produced a wide range of plug-ins.
How to cut an object
There are several ways to perform this task:
- Standard cropping.
- Cropping through selection.
- The advanced way.
Let's explore each one separately.
Standard cropping
In order to crop an image in this program in the easiest way, you need to use the "Crop" tool. You can call it either through the editing menu or by pressing Shift+S. If you hover your mouse over this tool in the editing panel, you can read its brief capabilities and see what keyboard shortcut it is called with. How you choose the tool depends on your preferences. Some people are more comfortable with a mouse click, while others call it with hotkeys.
Crop with Selection
To crop a photo using this method, you will also need the Crop tool. After you select it, you need to hold down the right mouse button and draw a rectangular area to be left. The brightness of this area will remain unchanged, but the part of the picture that will later be deleted will darken. This is done for a reason. Thus, you can estimate in advance what the result of the cropped image will be. Everything is done for your convenience.
Once you are sure that you are happy with the result, you can confirm the action. There are several ways to do this as well:
- Press the Enter key.
- Click the mouse in the center of the highlighted area.
- The advanced way.
We will not consider the detailed trimming in detail, as this would require a separate article. All you need to know is that the Crop tool has many additional features that can be used to trim more precisely and better in specific cases. You can explore all of these features in the program's instruction manual.
How to work with layers
If you need to create a composition of two or more images, you need to better understand the concept of layers. You can think of layers as individual sheets of paper stacked on top of each other. This means that effects can be applied independently to each layer, which can be very handy, as we'll see throughout the lesson. Just keep in mind that you can't see through the layers unless they are transparent - like with a paper stack.
Layer order and visibility
If you've been dragging and dropping files into your interface one by one, you've noticed that when you open the second one, the first one "disappears." What actually happens is that the second layer overlaps the first.
You can easily change the order of layers by dragging them up or down in the "layers" window, or select a layer and use the "up" and "down" arrow icons at the bottom of the window. You can also turn the visibility of a given layer on or off by clicking on the little eye icon to the left of it. To remove all the contents of the layer, select it and click the red " x" icon.
Color to Transparency
We've seen that overlaying two images implies that we can't see both at the same time. However, if the background from Graph B (above) were transparent, we could see through it, although the lines would remain visible.
To do this, select the layer and then go to Layer > Transparency >> Color in Alpha range. In image editing jargon, "alpha" means the "alpha channel" of an image, which controls the level of pixel transparency.
Changing Color
To do this, select the layer and go to the Colors > Hue-Saturation menu. In the window that opens, change the "Hue" value (you can choose an angle between 0 and 360 on the chromatic dial). If the "Preview" option is selected, you should see the changes immediately. Once you've selected the color you want, click the "OK" button.
How to Draw in the Gimp
In order to draw in the Gimp, you can use the brush tool and you can also use different shapes. It all depends on your needs. You can change the width and shape of the brush, use squares, ovals, circles, or other shapes.
Procedure:
- First, we create a new transparent layer.
- We select the Brush tool.
- Choose the color you want and start filling in the picture.
You can also work with other tools, like paths.
How to Install the Gimp on your PC
- You will need the installer of this program, which you can download online.
- Open the installer.
- Choose a language that is comfortable and understandable for you.
- Specify the installation path and click on the "Install" button.
- Wait until the installation is complete and then finish it.


Reviews - Gimp